Excel in creating Invoices with InvoiceOwl: Click Here to Know More
Quick Overview
- 01Users can easily customize invoices in Windows, MacBook or even make one from scratch in Excel
- 02Using Excel for invoicing offers easy-to-use templates, customizable layouts, and built-in formulas for easy calculation
- 03MS Excel makes it easy for freelancers and businesses to keep track of invoices and record keeping
- 04Provides easy integration with popular platforms, CRMs, and other tools to import data or financial records
Everything is good for Google Spreadsheets, Google Docs, and Microsoft Word. But when it comes to the Microsoft Excel program, things are different.
Microsoft Excel is a widely used spreadsheet program among more than 1.1 billion users. If you are a small business owner or individual looking for a cost-effective and hassle-free approach to invoicing, Excel is for you.
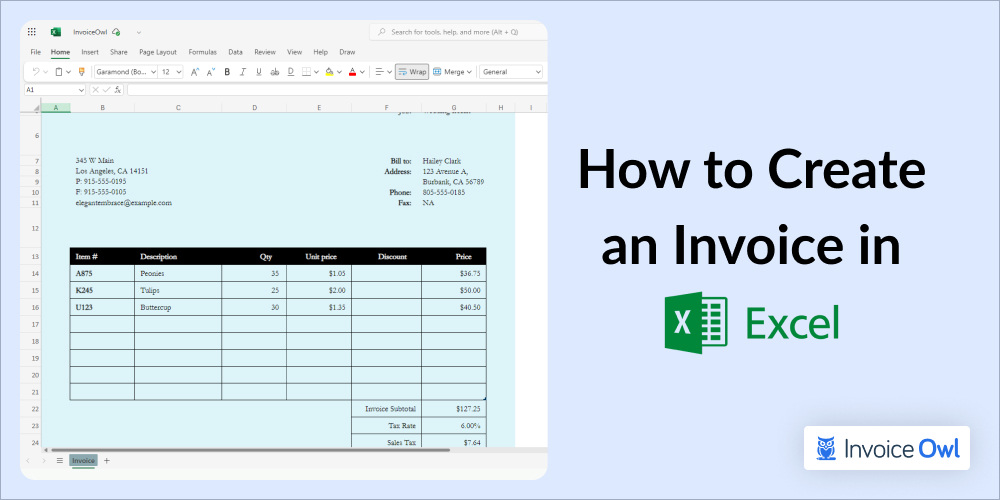
In this handy guide, we provide step-by-step instructions on how to create an invoice in Excel from scratch, add invoice components, calculate line items and totals automatically with formulas, save invoices as PDFs, and more.
Table of Content
- Before you Begin: Essential Requirements
- Method 1: Using Excel Templates (Windows + Mac)
- Method 2: Creating invoice from Scratch
- Free Templates and Resources
- The Bottom Line
- FAQs
Before you Begin: Essential Requirements
Before starting, ensure you have Microsoft Excel installed or access to a similar spreadsheet tool like Google Sheets. Gather all necessary information, including your business details, client information, service descriptions, rates, and payment terms, to streamline the invoice creation process. Finally, download a pre-made Excel template for added convenience, which we've provided in the blog further below.
Method 1: Using Excel Templates (Windows + Mac)
To create an Invoice in Excel that looks professional and is easy to understand, having a pre-designed template to work from is an effortless and effective activity. Simply open Microsoft Excel on your Windows or Mac device, choose your preferred template, start customizing it to match your brand, and your Excel invoice is generated.
Let's walk through a step-by-step detailed guide on using an Excel invoice template to quickly generate polished invoices.
Step 1: Open the Microsoft Excel program
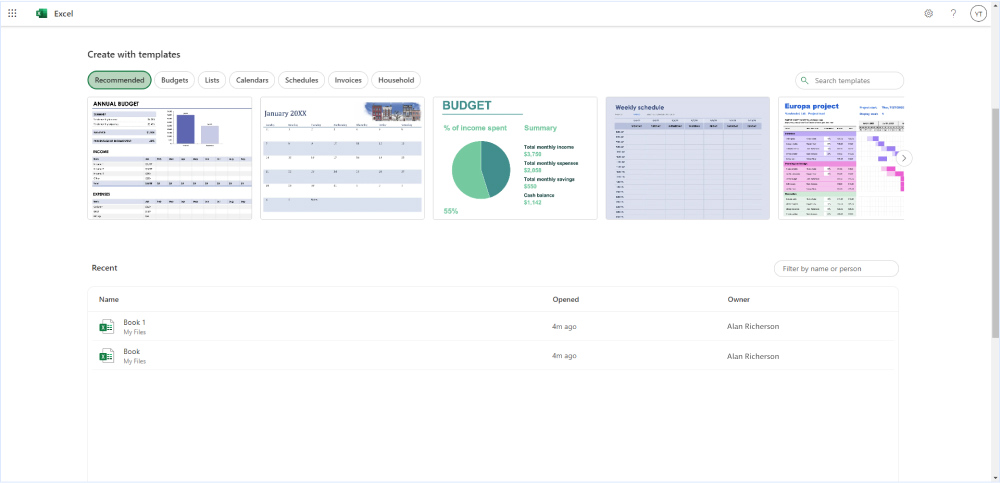
To create a free Excel invoice template for the purchase orders, you will have to open the Excel program on your PC or Mac.
Step 2: Search for the appropriate templates
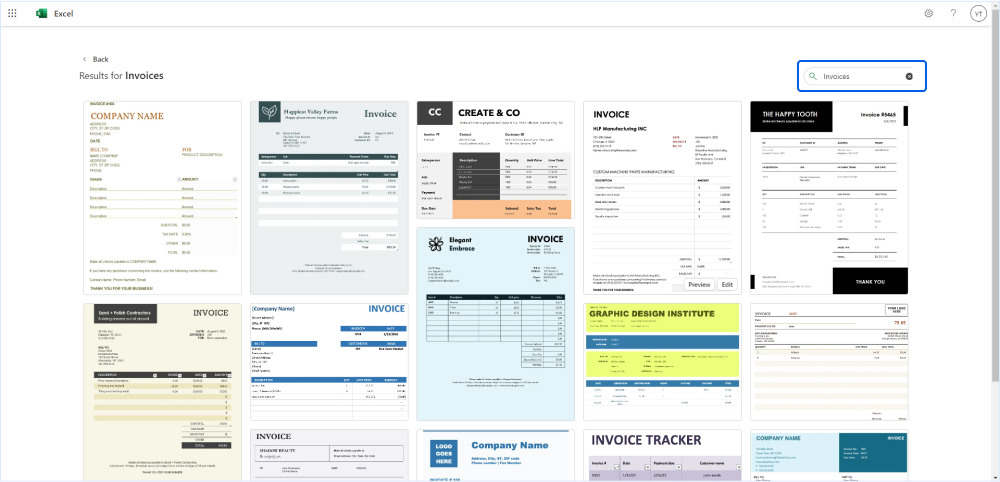
When you launch the Excel program on your device, search for Excel invoice templates at the top of the window. To narrow your options, type "invoice" to get Excel invoice templates. Your laptop or computer has to be connected to the internet before you research.
Step 3: Select your preferred template
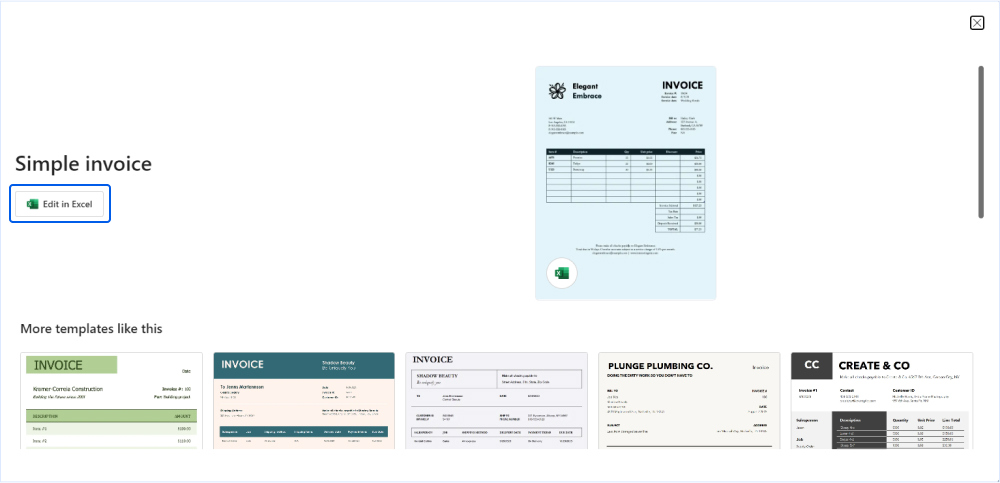
After browsing through several Excel invoice templates, you should have one that's useful for you. There's a range of templates for invoices in the Microsoft Excel program.
You'll find blank invoice templates for shipping, service, selling details, and other business types.
From the different Excel invoice templates, choose one that's good for your business as your invoicing solution, and download the template. Once you downloaded the template you need to open it.
Step 4: Open the template
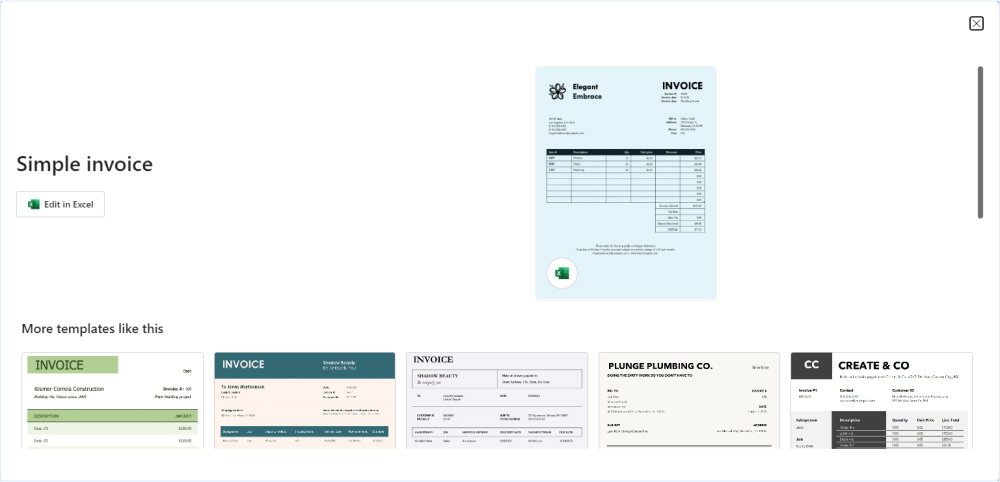
After you have made a choice, preview the free Excel invoice template and click on Create to open the blank invoice template or download invoices. The template will open in a new window.
Step 5: Personalize the invoice
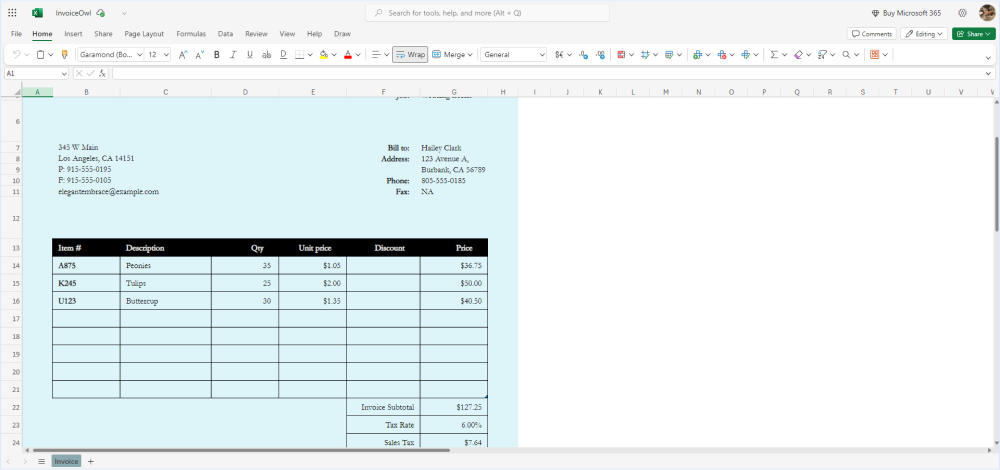
When you're done with the selection of the simple invoice template, you can then open a fresh spreadsheet with the template and start personalizing it.
The simple invoice template must have the necessary invoice details to show the client what they are supposed to see to make a payment on time.
Step 6: Save the invoice
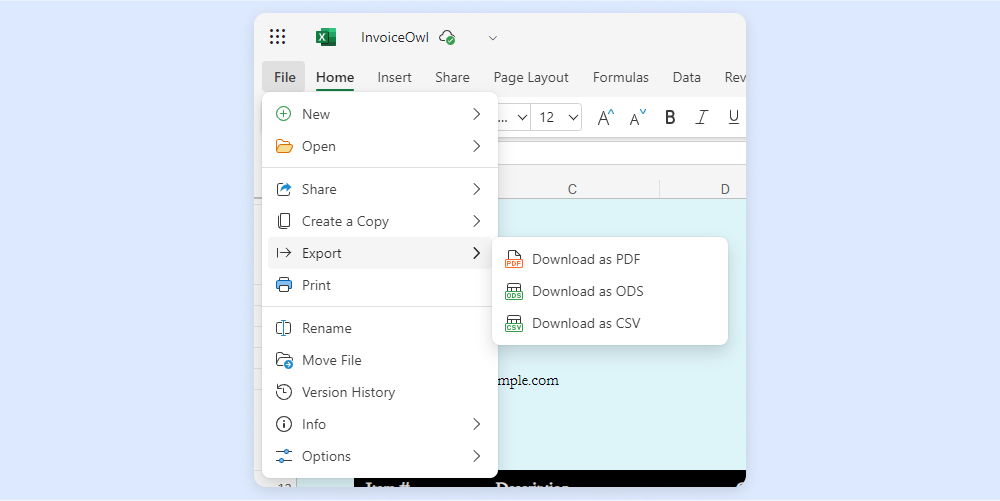
When you fill the free invoice template or invoice form with the necessary and require billing details of the projects, save a draft of the free invoice template as a spreadsheet on your PC or Mac. Alternatively, using free invoice software for Mac can simplify the process further, ensuring accuracy and efficiency.
It is preferable to save it as an Xls document, so it can be edited at other times if there's a need.
Also, save as a PDF document when you want to send the invoices to the customers so that they cannot be edited by another person.
Step 7: Send the invoice
Send invoices to your customers via electronic mail or print the invoices in hard copies and send free invoices through the post. Do not forget to add friendly notes that will impress the client.
Excel spreadsheets are smart, but InvoiceOwl is smarter. It lets you create branded invoices, automate payment reminders, store customer details, and help you send invoices in just a click. Try for FREE
Method 2: Creating Invoice from Scratch
To create an Invoice in Excel from scratch that is professional, clear, and easy to use one requires a methodical approach.
Additionally, consider the option to update customers via text message for a more immediate and personal touch, which can help increase your chances of getting a response.
Step 1: Launch a new Excel spreadsheet

The first step in this process is to open a fresh Excel program on your system by clicking a blank workbook.
Step 2: Create an invoice header

Small businesses should make sure that their invoice should be easily identified when a client sees it to pay the money. An appropriate header consists of:
- Your business logo
- Your business contact details
- A unique invoice number
- The invoice date
Step 3: Include the client's information
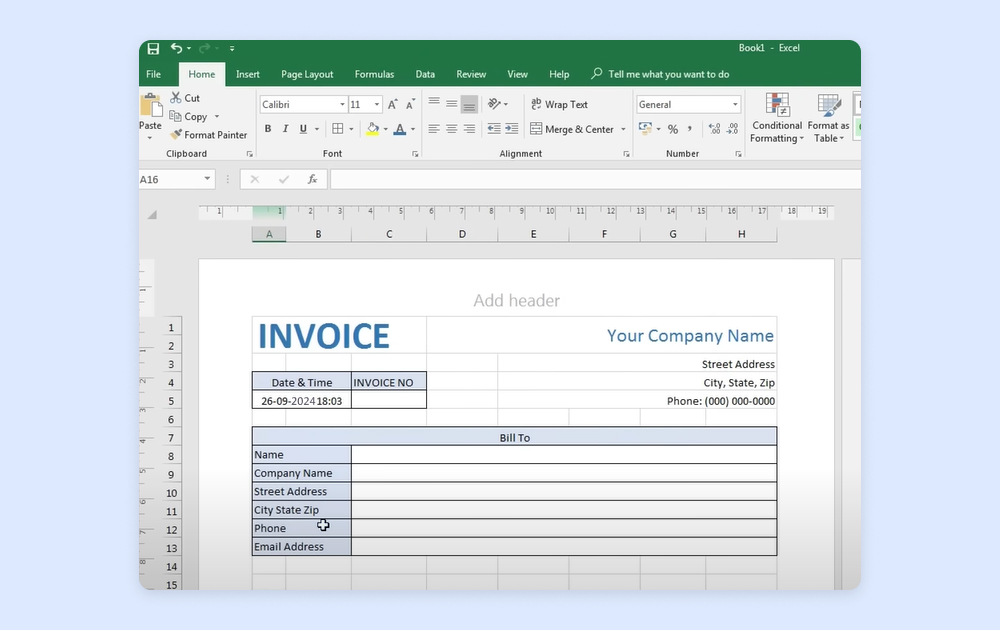
The details of the client you're sending the invoice to have to be on the invoice. Small businesses should ensure that you have the company name, logo, and address of the contact person or the organization you're invoicing, email, and phone number.
Step 4: Describe the services provided in detail
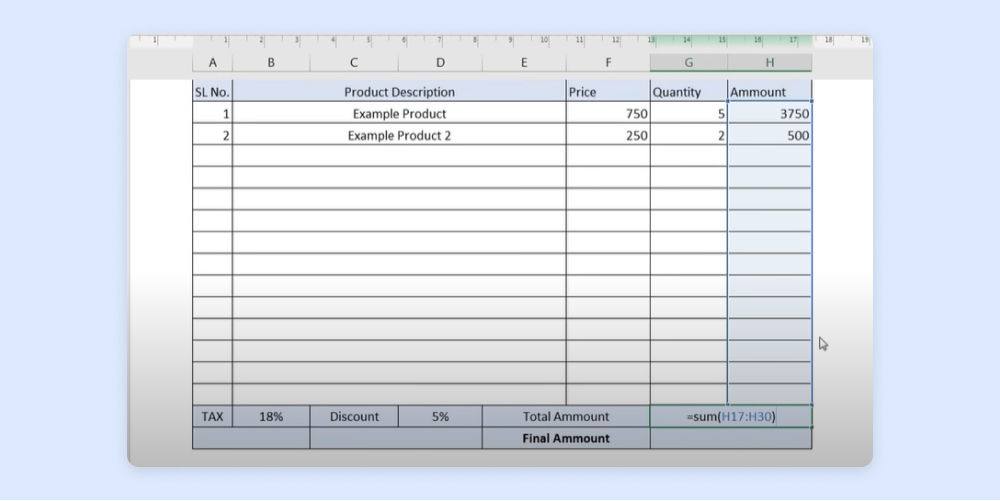
For clarity's sake, carefully describe the services and the price list roughly offered to the client in a service invoice template. If possible, divide the task into rows and columns and include your hourly rate alongside the number of hours you've worked. You should have a subtotal for the services listed.
Step 5: State the due date for payment
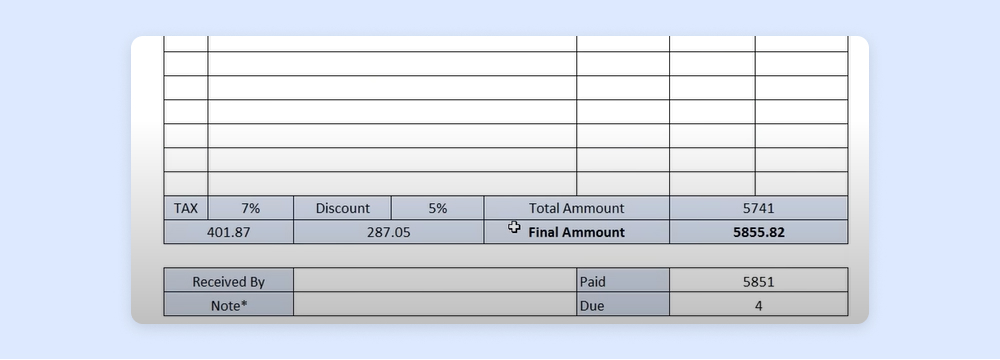
Every invoice template for Excel you send should carry a due date so your cash flow won't be affected. For clarity's sake, fully write out the date. For example, "Payment is due February 20, 2025". Sometimes, writing in short forms may be confusing and can delay payment.
Step 6: Add the subtotal
An advantage of preparing invoices with the Excel program is that the program's features itself can help you with mathematical tasks. With the SUM function of the Excel program, you can add up every due in the billing cycle.
For instance, if you're adding up column Dates from cell 6 to 8, all you need do is to enter this formula in cell C9: =SUM(C4: C8).
If you're adding up column Dates from cell 6 to 8, enter this formula in cell C9: =SUM(C4: C8)
Step 7: State your payment terms

Payment methods, late fee policy, and other payment details a customer should know must be included at the bottom of the invoice that is the right way to create a free invoice template for Excel.
Microsoft and Google both provide templates through Excel, Word, Google Docs, and Google Spreadsheets that can justify your invoicing requirements in the easiest way possible.
It also offers you to save the templates according to your requirements so that you don't have to waste your time on unnecessary tasks.
No matter what kind of format, features, or system you choose for your invoice template, whatever you choose as your invoice template for Excel or Word should fulfill your business requirements.
Just make sure that whatever you create using Word or Excel looks professional and fulfills your branding image. With Word and Excel, you can have entirely professional invoices that help you maintain your brand image.
Step 8: Generate invoice from Excel
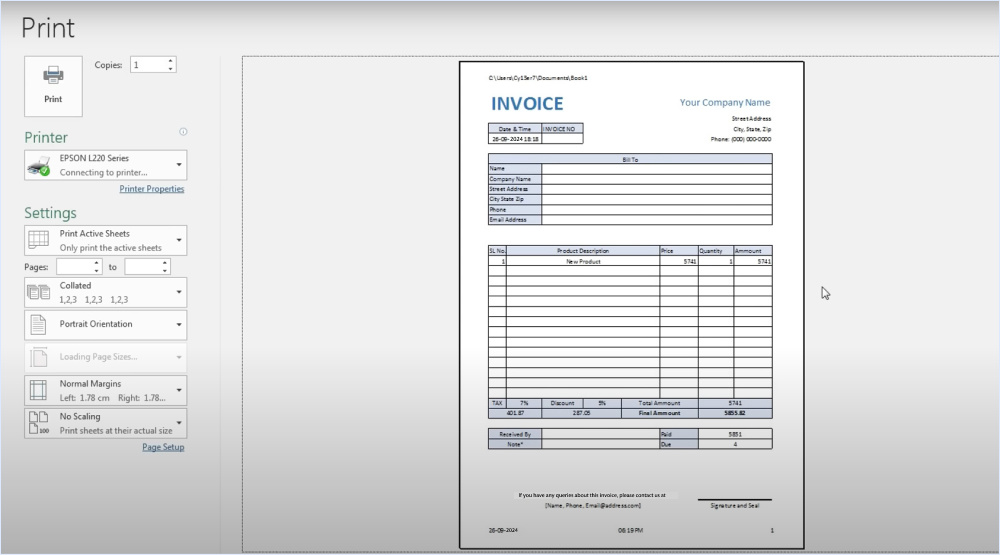
The invoice design associated with Microsoft Excel can be sent to your client through mail or email.
Here is a free tutorial on how to create a professional invoice in Excel. Give it a good watch
Free Templates and Resources
You can now download and make invoice with Excel with free templates through InvoiceOwl. The software offers a broad range of customizable free invoice templates, which can be downloaded in various formats, including Word, Excel, and PDF. With our free invoice templates, you can access a wide range of industry-specific templates no matter what sector your business operates in.
Template Gallery
- Shipping invoice template
- Hotel invoice template
- Car rental invoice template
- Attorney invoice template
- Freelancer invoice template
Customization guide
- Microsoft Word invoice template
- Google Docs invoice template
- Google Sheets invoice template
- PDF invoice template
Having readymade and free-to-downloadable invoice templates handy can make it simpler for you to handle multiple client billings and invoicing. Remember, the quicker you create the invoice and send it to the client, the quicker you will receive your payment.
Ready to Streamline Your Invoicing?
Simplify your workflow and reduce stress with InvoiceOwl's automated invoicing features.
Try for FreeThe Bottom Line
After this entire guide on the significance of creating professional invoices using free Excel invoice templates, it's clear that Excel provides small businesses an incredibly versatile and customizable invoicing solution.
Whether working from pre-designed templates or building your own spreadsheet invoices from scratch, you can produce branded, professional-looking invoices that instill confidence in clients and get you paid faster. The key is ensuring all critical information is clearly presented - company details, client data, service descriptions, payment terms, etc.
Frequently Asked Questions
Creating an invoice from scratch can be time-consuming, but with InvoiceOwl's free downloadable Microsoft Excel templates, it only takes a few minutes. Simply choose the template that fits your business needs, download it for free, fill in the necessary details, customize it to match your brand, and then save and send it to your clients via email.
No matter what industry your business is in, InvoiceOwl has invoice templates for it. Using our software, you can access a large selection of invoice templates that are specific to your industry.
The best way to create a polished and effective invoice is by keeping the layout clean and understandable. Its also important to ensure that the information such as client information, provided services, dates, and payment terms are highlighted clearly.
Essential design elements include the company logo, business name, and contact information at the top. This information is further complimented by clear sectioning for billing details, line items, subtotals, taxes, and the final amount due. While you're at it, do not forget to use consistent colors and alignment as it helps to improve the readability.
Using Excel for invoicing allows you to follow clear and concise practice. However, its crucial to use consistent formatting. Moreover, an invoice should only be converted into a PDF after every information is verified. Also, it's a good practice to double-check all the details to avoid any delays in payment.

